| |
|
|
|
back to Tiger main |
 |
About designing the Tiger

|
 |
 |
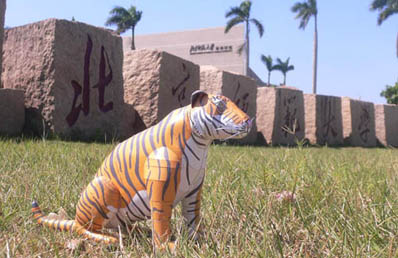
The tiger model at Bejing Normal University, Zhuhai, where it was created.
 |
| |
|
In March 2021 I moved to Zhuhai in South China to become a teacher at the new "School of Future Design" built up there as part of the local campus of Beijing Normal University.
In late 2021 I had too many courses and other responsibilities to work on any paper modelling for many months, so I could only get started on the tiger in early 2022. I managed to get the 3D-model finished by end of January but development took longer than expected. As I was not able to release before the Chinese new year started, I decided not to hurry myself with the development.
 |
 |
 |
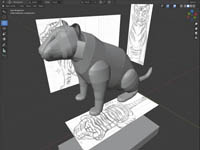
Initial drawing for the tiger
 |
| |
|
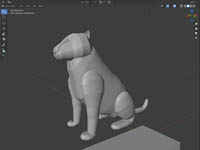
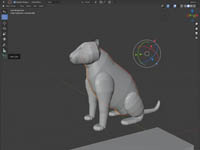
I wanted to make the Tiger somewhat more house-cat-like in proportions and pose, which can be seen from the three-view drawing I started with. When I had the 3D-model finished based on that, I felt that the head position was strange and the posture too statue-like. I also found it looked too much like a dog. Based on pictures of sitting tigers, I modified the back and head. If you look closely at the pcitures you can see how I made the back more resembling a cat's arched back. Actually on the final model, it's the back I'm the most pleased with.
 |
|
 |
|
 |
 |
|
|
|
|
| first full 3D-model |
|
with slightly modified back |
|
the final version |
Once I had the 3D-model done and was satisfied, I could go on onto the surface painting. Since working on the cow/ox I had forgotten slightly how it works in Blender and had to re-learn the steps slightly, but at least this time it went a bit smoother than with the cow/ox.
The stencil on my new notebook did not work, it deleted instead of painting, so I actually "fingerpainted" the stripes on the touchscreen.
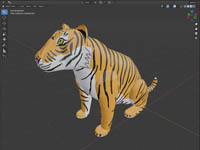
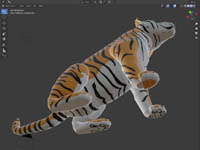
For the cheek hairs, I had only built a simplified squared-off part, which was then supposed to be drawn into hair-shape, you can see that in the pictures. The final version of the hairs was done in Freehand later. As stripes on an actual tiger are not symmetric, they are neither on this model. Only the paw detail, which are the digital and metacarpal pads, was mirrored for the two right legs in the end.
 |
 |
|
 |
 |
|
|
| The full 3D-model with paint. Note the painted on cheek hair. |
|
from below. Note the paw pads, which were later mirrored to the other paws. |
| |
|
|
|
| |
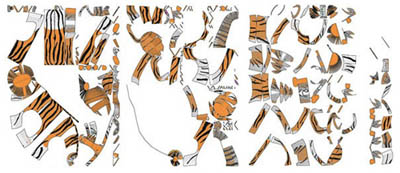
While Blender has an excellent system to mark the seams and then automatically unfold the model, the results that come with the "export to paper model" plugin can be rather messy, especially with such more complex models. Already before exporting, a lot of cleaning has to be made, because especially when parts are united through a Boolean operation, a lot of double vertexes (those are the corner points in 3D) are created, as well as impossible surfaces, because surfaces must be flat to be exported to patterns. This took quite a time to get them all to export. Even more than with the cow/ox, what came out was a mess. |
| |
 |
 |
This is how the unfolded model came out or Blender.
 |
| |
|
 |
|
 |
|
Model parts after tidying in Freehand.
 |
|
| |
|
The longest and most painful part of developing the tiger model was in figuring out, which part is which and which is not needed and tidy them up. This was done in Freehand, and of course the painted parts from Blender had to be converted into paths. |
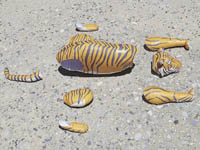
| After tidying had been done, it was to distribute the parts onto pages, add glue tabs and send them to print. Again there was a time where I was rather busy and I also collected things to print together and waited to finish new versions of other model projects. Then again at the end of the 2022 summer term there was one month where I had no time to work on modelling. In the summer holiday in July, I finally built the tiger for the first time. |
| |
 |
|
 |
 |
|
|
| The main parts of the testbuild. |
| |
|
|
|
Until then I had not been very happy with the tiger model, the development was not as joyful, especially when I was thinking of the cow/ox model having been downloaded so few times, when I had been so pleased with that model when it had been done. I felt creating this is a waste of effort becuase a lack of appreciation for it.
When I built the tiger it first felt like performing a duty. But as I saw how it turned out, I became more and more happy about this model.
My wife decided that this model was too lifelike and scary and said I should have made the tiger more cute, so I ended up hiding the model from her. But I myself feel that he is a good compromise between a rather mild, soft feeling and the fierceness and awesomeness a tiger naturally represents.
As said before I was very pleased with the back, I adore the rear shots of the model, particularly the one where he is looking at the water. And I was also very pleased with the round paws. After previous animal models I wanted to make the paws more roundish, thinking of the cats that I used to live with. The paws are a bit difficult to build, but they totally came out as I had hoped.
|
| |
 |
|
 |
|
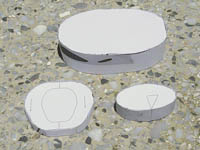
| Formers had to be corrected, and this testbuild confirmed their correct size. |
|
| |
|
|
In the testbuild, the only major issue was that the three formers which form cylindrical parts did not fit properly. I wanted them to fit as good as possible at least for the regular size of the model and the recommended paper size (120gsm), so I re-did them and tested them. That time they came out perfect, so if you have trouble with them you either have the wrong paper size or have (intentionally or unintentionally) re-scaled the model.
Finally I took the tiger model to a photo-shooting around the campus of Beijing Normal University, which is actually basically a big beautiful park. And the environment here was so befitting the tiger model with its tropical vegetation and bright light. I could not have wished for a better place to shoot the tiger. Although tigers used to live in the wild in these parts, now they can be only found in the zoo.
|
| |
| return to top |
| |
|
|
|
