| |
|
|
|
back to Dog main |
 |
About designing the Dog
|
 |
|
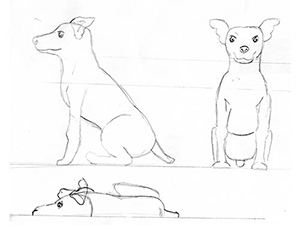
The initial sketch which the model is based on
|
|
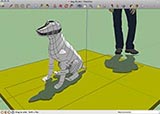
After the Chicken model was such fun and turned out so nice, I thought I should take this to the next level for the next animal of the Chinese Zodiac. Also my co-workers from Singapore office of the company I work from asked me, if they may use the model for promotion in the China market. So I thought the model must be quite good. My co-workers here in Germany also expected a Dog model to happen as they are crazy about the quasi-office Dog, which is a Dog that comes to visit now and then, owned by the fiancee of another co-worker: Jack, the Jack Russell.
Based on that very Dog, I made a 3-view sketch to use as a reference. This was then imported to Sketchup, where I drew up the model.
|
|
|
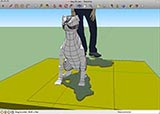
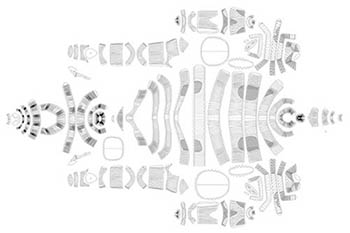
Compared to the Chicken, the Dog ended up with a much more complicated structure. Firstly, the sections of the Chicken where all oval, while the Dog's are somewhere near irregular rounded squares. Secondly, the rings the parts are made up were much more and thirdly, the surfaces in one ring where more to achieve a less polygon-like appearance. This resulted in a much more time-consuming unfold process. With thousands of surfaces, and each being one manual click, this was rather mind-numbing. Hence I couldn't work on it more than half an hour a day or I would go crazy. This stretched out the unfolding over much longer time, I basically needed one week (fortunately I had a week of holiday).
|
 |
|
All parts after unfolding, the ears are still missing
|
| |
|
| |
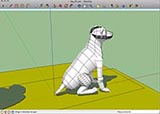
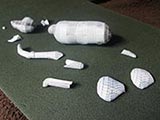
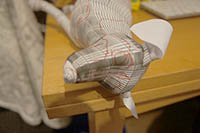
After unfolding the first test build was due. As legs are mirrored, I saved the time to build them once only.With the hip, things were different, as I wasn't sure, if it would hold good enough, as they were just half and glued on the surface of the body. I therefore tested this against the option of having a full enclosed part, that is inserted in a hole cut out of the main body. While the half hip did work better than I expected, I still opted for the full enclosed version, which made it much easier to get the hip right and which also made the hip more durable. (After all, this is a rugged Jack Russell).
The ears were then created manually, as I couldn't think how to do the way paper needs to be folded for them
using a polygon in Sketchup. I created two versions of the ears, a straight batwing-shaped ear based on Jack's ears and a more classic bent ear. These were than flattened, and scanned.
|
 |
|
 |
|
 |
|
|
|
|
|
| The first testbuild. Ears were created manually. Legs were built only once, as they are mirrored. Two hip versions were tested. |
|
| |
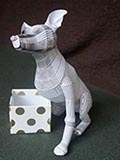
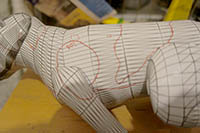
Other parts were also scanned and flattened after I had drawn on the lines for the spots of Jack and the belly-line for the Chinese New Year version, the "liveries" so to speak.
The spot on the right shoulder had to be drawn on the left shoulder, as right legs weren't built, after drawing them in, I then mirrored the parts to put the spot in the right place.
|
| |
 |
|
 |
|
|
|
| The testbuild with spot lines painted on |
|
The spot of the right shoulder was drawn on the left one. |
| |
|
|
|
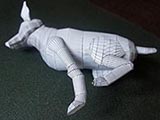
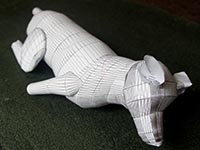
To make sure, that the spots and lines align correctly, I did a second testbuild, this time with only parts of the right legs, nothing more than was absolutely necessary.
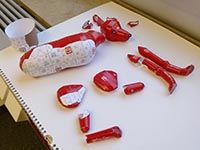
After that I could go on creating instructions and versions. I then started with the first full build, which was also the Demonstration version to be shown on the website.
This version was then used to take not only the usual promotional pictures, but also a number of "Travel pictures" which the Singapore office of the company I work for used for promotion on Weibo, the Chinese version of Twitter. Also, my Superior then took the model back to Singapore to be displayed in the office there.
|
 |
|
 |
|
|
|
| The second testbuild, this time with right legs, was to check correct alignment of spots. |
|
Parts of the final Demo build. In the back another test of the waist. |
| |
|
|
|
| All in all the project was somewhat exhausting, as I had to make the deadline of finishing before the Chinese New Year and because I underestimated the complexity of the 3D-model. But then it was also worth it, as the final result turned out quite impressive after all. |
| |
| |
| return to top |
| |
|
|
|