|
|
back to Chicken main |
 |
About designing the Chicken

|
 |
 |
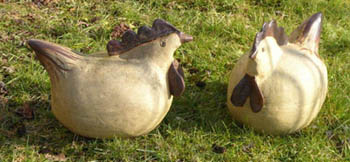
One of the classic chicken/bird designs of my mother, Ebba Stahl
 |
|
The chicken model was a quick model in its development. It was basically created on three successive weekends. Since the creation of the rabbit, I had wanted to create another model of an animal of the Chinese zodiac for the new lunar year. I had actually started on a dragon, but that was still in development limbo.
My inspiration came from classic designs of birds and chicken created by my late mother, which are basically a big egg-like body with small tail and head added. With the memory of those in my head I started with the 3D-model in sketchup.
 |
 |
 |
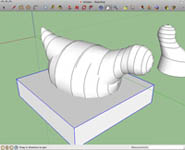
The initial model in sketchup.
 |
|
 |
The model was quickly sketched, although I took the time to try out several versions of the head and neck section.
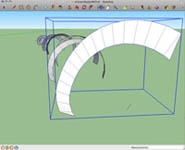
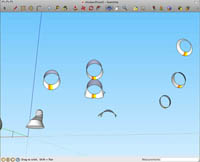
Next was unfolding with the flattery-tool. As usual this was somewhat time-consuming.
 |
 |
|
 |
 |
|
|
| The body during unfolding |
|
The neck section during unfolding. yellow & orange fields are to mark where the center of the part. |
|
| |
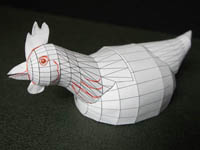
It was due to the speed I have worked on this, that I did not research deeper in how to make more round parts, which I only found out after this model was finished. Once all parts had been unfolded and then edited in Freehand, I could go ahead with the first (and only) testbuild. I left the lines of the polygons as created by sketchup in the parts, as a reference when drawing the few lines that go across parts.
I did not test out the round (or more like 24-sided) shapes in sketchup for an actually built model before and was surprised how well they fitted.
 |
 |
|
 |
 |
|
|
| The only testbuild. Polygon lines from sketchup can still be seen. beak and appendages were added manually |
|
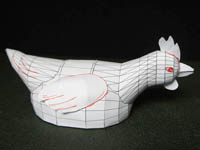
view of the left side, with the manually created wing and the eye that made it into the final model. |
| |
|
|
|
| |
Once the test build was finished, I created the remaining parts manually: beak, appendages and a wing (which was later mirrored for the second wing. I drew the structural lines on and two versions of eyes, of which the second one made into the final model.
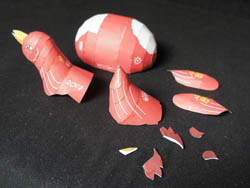
As with all hand-created models, the testbuild was taken apart and scanned so I could then draw the hand-made parts in Freehand and use the other scanned parts as a reference to draw in the structural lines. To be true to the inspiration for the model and its predecessor model, the rabbit. All structural lines were kept absolutely minimal. For the Chinese new year version I just had to snatch the decoration from the rabbit and put it in. Funnily I initially had “happy year of the rabbit” on the design, but my wife fortunately made me aware of it in time.
|
| |
 |
 |
Several parts of the final model before assembly
 |
| |
|
A funny story connected to this model was, that I created the A3-version to give to friends as a kind of Chinese new year card and I gave A3 prints to my co-workers at Frankfurt and sent the pdf to my co-workers at Singapore (all women). I didn't expect any of them to actually build it - I was very wrong about that.
In the coming weeks, a funny competition developed between Frankfurt and Singapore with constant mails bragging about one's progress being sent back and forth. In the end Singapore won time-wise as the Frankfurt colleague more skilled in handcraft fell ill. She still won her own victory by being able to build the A3-version in its actual size, while Singapore had scaled up.
|
| |
 |
 |
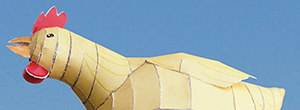
The updated chicken with two wattles
 |
| |
|
In 2018, during the creation of the plane re-releases, I took the time to update the chicken with two wattles. Wattles are the skin flaps hanging from a chicken’s chin. The original versions of the chicken were created largely without references, and only when I created the instructions, I noticed, that it should have two wattles rather than one. At the time, I was in a hurry to publish the chicken, so I decided to do it later.
|
| |
| return to top |
| |
