| |
|
|
|
back to A/T-37 main |
 |
About designing the Cessna A/T-37
|
|
When I looked through my files to find images of test builds for the Tweet model, it occured to me, that I was unable to find images of all testbuilds, particularly the first full test build (or beta 1), of which I am sure I took them. This is because the Tweet was created in an off-again-on-again fashion, reflecting several changes in my life. The development stretched out across three job changes and moving five times. I obviously failed to collect relevant photos in one place. Nevertheless I was still able to assemble some of them here.
 |
 |
|
 |
|
 |
 |
|
|
|
|
| prototype fuselage |
|
outer shape finished |
|
lower side |
| |
|
|
|
|
 |
|
 |
 |
|
|
| Tip tank and refuel gear added... |
|
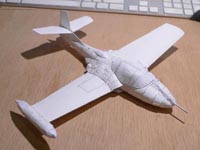
... and panel lines drawn in. |
| |
|
|
|
 |
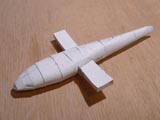
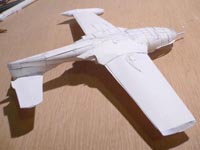
The prototype was created 12/2012, using my old method working by hand from a three-view. As the tweet would have been extremely fiddly to design in 1:60 scale, I decided to scale up for development by 150% which leads to a scale of 1:40. In time this led to the decision to make the Tweet the first stahlhart aircraft model not released in 1:60 scale as I was worried that certain small parts will become too small for the average modeller. I finally settled for 1:48 scale as this is a common scale for aircraft models.
One thing that caused a number of problems later on was that I worked off a rather incorrect three-view, but it was only until later that I discovered this. Having the T-37 and A-37 have the almost exact same air intake was a creative decision, as the difference, aside from the missing splitter plate on the A-37 is only obvious on closer inspection. Other creative decisions were how to design the inner sides of air intake and exhaust, as I did not have reliable material. Based on what I had, I moved the intake plate with the compressor blades twice and settled for the way it came out. For the exhaust I had added a cone, because I had seen that on 3D-models of the Tweet, but I decided for a more conservative exhaust, as other sources did not confirm the existence of said cone.
For the A-37 version, I added the tip tanks, the bulges for the bigger landing gear and the aerial refilling gear on the nose.
 |
 |
|
 |
 |
|
|
| The first test build (or alpha)... |
|
... still without landing gear and details |
| |
|
|
|
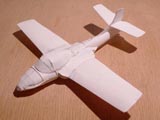
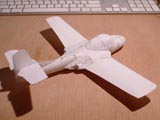
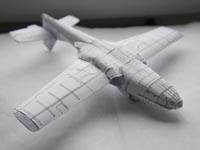
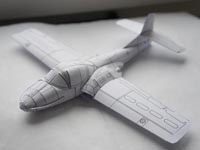
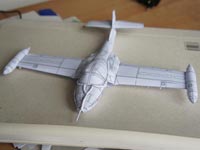
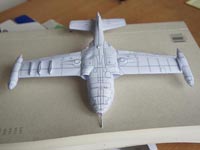
As I had done with the F-18 before, I first came up with a simplified first test-build (alpha or pre-beta) which was also meant to help me figure out the landing gear. Aside from the basic outer shape, it did not have any further details with the exception of the strakes on the nose section.
The nose section overall took a lot of development work, because I wanted it to be more accurate and round than all pre-existing Tweet models, namely those by Jack the Paperman and Oddball productions.
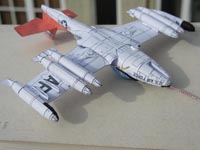
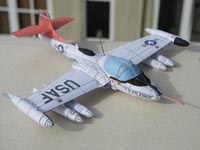
The following Beta 1 was the first version with full details and it had some simple markings to depict what later became the gunship grey version. I would have edited the images to turn white into grey.
For the first time, I included what i call a "sculpted" landing gear, which is created from rolled paper only rather than detailed 2D-drawings to be strengthened by a toothpick, which is the classic stahlhart landing gear style. Fortunately the increased size made it possible for me to build such a landing gear.
 |
 |
|
 |
 |
|
|
| Beta 3 testbuild with added markings |
|
Black part painted in by hand |
| |
|
|
|
| |
Moving on to Beta 3, I once again added full markings, this time in color, to have a nice picture as a preview pic for the "work in progress"
on my website's homepage, it can still be seen in the official model gallery. As I hadn't figured out the livery lines to align across seams, the anti-reflection spaces were painted on by hand.

|
| |
 |
|
 |
 |
|
|
| Beta 4, note the hole in the canopy used to test the cockpit |
|
Beta 4 lower side |
| |
|
|
|
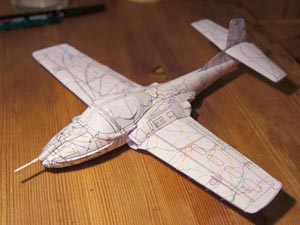
Beta 4 was to become the prototype for half of the sophisticated livery versions. On the images of Beta 4, a hole in the canopy can be seen. This was a remnant of the cockpit development, which had been going on since beta 1 and the cut out canopy had been a way to check on the cockpit under the canopy without going to lengths to build a clear canopy.
Another thing to be seen on Beta 4 version was a largely modified wing, as the upper surface had been to small. If you look at the photos, the wing has been cut through along the entire width about one sixth from the leading edge. This wing ended up to become the final version.
The section which caused the most trouble with the Tweet model was the engine section, which led to a lot of frustration for me. If you look closely at the Beta 4 you can see, that here, the upper side of the intake is too short. Getting it right was particularly difficult, because it also required accurate test builds, so I had to make sure in every test build, that it was in the exact same position.
 
|
 |
 |
Beta 4 with camo and livery lines drawn in
 |
|
As said before, the Beta 4 was also the prototype for the first several more sophisticated versions, including the Thunderbirds, the South-East Asia Versions, the Black Eagles and several Camo-Versions including the Chilean wraparound and Peruan versions.
The lines needed for those were drawn on and the build taken apart to be scanned and drawn in into the next version. But at that time, I lost my job and moved back to my parent's house to look for a new job from there. At the time I was under huge pressure and was forced to abandon all work on papermodels, even having to recommend the pre-existing Tweet models to my "clients" and fans, which can still be seen on the 2014 news archive page. Development went into sleep mode.

|
 |
|
 |
 |
|
|
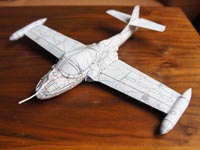
| Beta 5 clean with tip tanks |
|
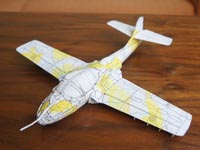
Beta 5 with Peruan Camo painted on |
| |
|
|
|
The creation of re-releases during that time further kept me from working on the Tweet. In 04/2015, I finally managed to find time and motivation to re-start with the development, drawing in the livery lines into Beta 5 and building it. I had kept only the Beta 3 while moving 4 times.
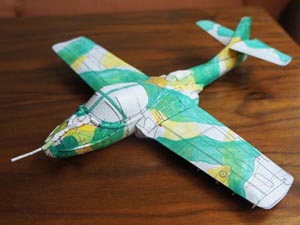
As the risk of forgetting required lines is especially risky with camos and even more the wraparound camos (which also stretch acrossundersurfaces) I started a new technique to ensure all required lines: Painting in the fill between the lines on the beta. With the Tweet Beta 5 I did this for the first time. First I painted in fills of the Peruan version, then of the South-East-Asia version and finally of the Chilean wraparound version. Through this I could easily compare later, where fills needed to be on what part.
 |
 |
 |
Beta 5 again, now the SEA-livery (light green) and Chilean wraparound (dark green) have been painted on.
 |
|
Further builds of this batch of liveries followed whenever there was time to work on them. Finally I was able to continue with the next colour prototype, beta 10. Drawing on the lines for the second batch of liveries and once again continuing building, then adjusting the lines and building again until the lines finally align.
A particular hold-up during these tests was the aerial refill gear installed on certain versions on the nose, because I first had to build the model without them, make adjustments on the nose below, then install the aerial refill gear and adjust again.
Further livery lines were tested on the fuselage of the Cessna 407, which was developed alongside.
 |
 |
 |
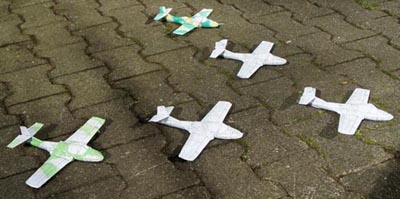
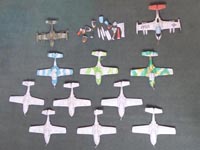
Betas 5 to 9 in formation, photographed for a preview pic
 |
|
Again and again a potential release moved further and further into the future, but I didn't let myself be discouraged. Although at the time I was highly dissatisfied with the model, largely because of the way wings and engine sections are installed. One has to be very careful to align them, or the gaps where the engine sections are installed have different sizes on both sides. Also one needs to be careful that the wing stiffener box does not create dents on the wing.

|
 |
|
 |
 |
|
|
| early test of the cockpit |
|
|
| |
|
|
|
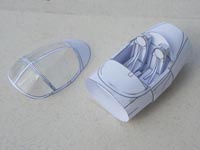
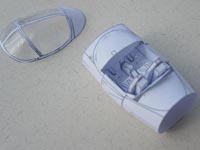
Cockpit kits were developed right from the beginning. There were two tricky aspects to creating the cockpit. One was that the cockpit had to be fitted into a stiffener, which the Model required to get the loosely square-like section of the fuselage right. The second was to make sure that the seats fit under the canopy but also are not too low to overlook the panel.

|
 |
|
 |
 |
|
|
| All survivng test builds in November 2019 |
|
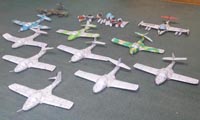
Note how the betas are 1:40 and the full build is 1:48 scale |
| |
|
|
|
Once test builds were through, i created 4 basic versions which I called the Version Masters, 2 each for the T-37 and A-37 with each set of liveries. These Version Masters already included all details, numbering etc. but still had all livery lines in them. For creating the versions, then the unneeded livery lines were deleted out and then the version could take shape. I had already prepared roundels and other markings while I was still in the test-building phase. Nevertheless I completely underestimated the amount of time required to create a version, especially with almost 50 versions ot be created. At best it is possible to create 4 versions a weekend, and that is extremely lucky. In the end I wanted to give up on creating certain versions, but I went through with all planned versions.
The inaccurate 3-view I had used caught up with me when one of my test-builders discovered that the tip tank fins on the A-37 were too small. I finally based their size on actual photos from below, as no 3-view that seemed correct could be found. Of course this had to be re-done for all A-37 versions.
Despite my earlier discontent with the model, I ended up being very pleased with it, when I did the final builds of the demo model to be photographed for the model gallery. And also through building it so many times, I also became an expert on how to get the engine section and wings right.
The Tweet model marked a first on several things: The first to be released with cockpit kit at the start (with the exception of the CH 801, which did have the cockpit included rather than as a kit), first to feature sculpted landing gears - which I am not sure if I want to continue with - the first to be not released in 1:60 and the first to be released in 1:48. Despite its long development, creating it was worth my while and it will be a milestone in the history of Stahlhart papercraft. After all aren't all parents happy when they discover a troubled child grow up to become a decent person.
Thanks to Péricles and Lorenzo for building additional versions for the model gallery!
|
| |
| |
| return to top |
| |
|
|
|
