| |
|
|
|
back to Snake main |
 |
About designing the Snake
|
|
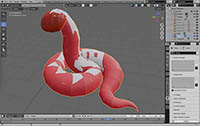
I originally considered the snake model something quick and easy
to do and while it was certainly easy to do, it was as quick as you might expect.
As far as 3D models go, it was easy enough, being made up of only two objects (those are separate elements in
Blender that are combined to the full model). The shape to start with was a torus for the initial round of the coil.
Sizes and angles of each ring, which will become a seam in the model would then be adjusted. The head was a separate object.
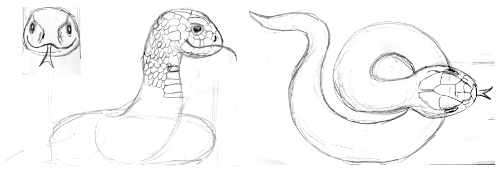
As you can see from the 3-view I had drawn, I originally considered to have a kind of nose-shape,
which would have been more snake-like, but abandoned that for greater simplicity and to avoid the snake from looking too fierce.
|
 |
|
 |
|
|
|
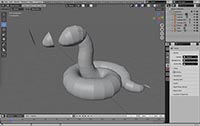
| The basic 3D-model |
|
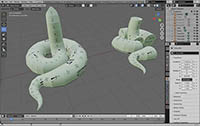
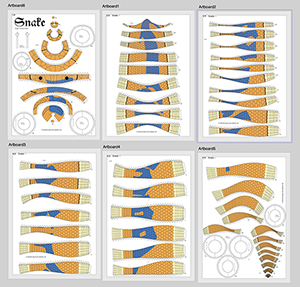
The body with texture, cut apart for the formers and with numbers to identify the parts |
| |
|
|
|
|
|
The basic model was quickly done, then I drew the scale lines on the head and the first section of the body.
The texture image for the head was later lost, which is why it is shown here as the exported out parts.
During the unfolding and exporting to patterns, I also cut apart the snake to create formers to strengthen the body.
The scale lines were then redrawn as vectors in Affinity Designer. This was what took the most time,
because all scales were drawn manually with the mouse for over 50 parts, not some automated function.
While repetitive and therefore exhausting, I find it was totally worth the effort.
|
 |
|
The unfolded head with original texture paint
|
| |
|
| |
|
After the 3D model was finished, I had the idea to write the Chinese character for luck or fortune 福 fu,
which is displayed everywhere for the new year and which is also present on all previous animal of the year
models on the snake in a way that it can only be recognized from the top, written across the coiled body.
I first wasn’t sure if I wanted to do it as it would be a lot of extra work, but then decided it was too cool to not do.
For myself I wanted to have the snake with the fu only, because I got tired of the decoration used on previous animal of the year models.
However I also created a version (the classic any version) which has them and one which included the fu character and the decorations.
While creating the new textures, the original texture for the head was lost, but didn’t matter, because the head had been already finished.
|
 |
|
 |
|
|
|
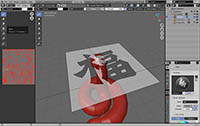
| Fu-character projected on the model for painting on |
|
The finished texture-paint for the fu-version |
| |
|
|
|
| |
|
I then brought the new-exported parts in again to draw the fu character on body and head parts.
While the bend lines from the polygons of the 3D-model are not needed in the final model,
they are of course used to align the paint job lines across seams. This again was time-consuming,
but paid off as no adjustments had to be made on the finished model once test builds. |
| |
 |
|
The versions master, which all versions are adjusted from
|
| |
|
|
The only thing that had to be adjusted after the test build were two scale lines were added on part 59,
which were on part 60, but missing on part 59, this can still be seen in the photos.
While the model is probably not too fun a build because all parts are pretty much the same,
I find it makes for a really lovely model and especially neat with the fu character.
|
| return to top |
| |
|
|
|