|
|
back to Skyknight main |
 |
About designing the Douglas F3D Skyknight
|
| |
While working on the Heinkel 111 and the Drum Tower, I felt the itch to build some simple plane that can be finished easily, at least that's what I thought. When I had begun designing paper models, the F3D Skyknight had been one the planes I had considered to do, because I thought it's easy to do thanks to its straight wings. I always had a weak spot for this plump aircraft, inspired by my dissatisfaction when building the Matchbox plastic model many years before.
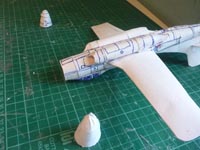
The prototype build went quite easy as usual. I enjoyed doing a fuselage with many cones to achieve a well-rounded shape for the "Whale". I also tried hard to do justice to the typical rounded drop tanks, with the thought, that they might be re-used for other models.
Creation of the two different nose versions was also easy.
 |
 |
|
 |
 |
|
|
| The prototype with added panel lines |
|
The prototype after the cockpit was modified to single-seater |
|
 |
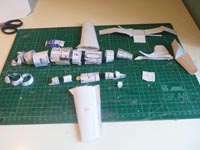
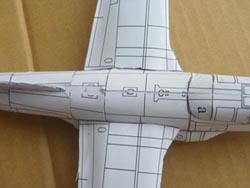
Since I had made good experiences with a pre-beta on the Rabbit and Heinkel 111, I created a pre-beta, that didn't have any detail yet, but only the basic shape. When building the pre-beta I found the fuselage was too slim for the whale and wanted it to be fatter, so I made it fatter by cutting it in half, and adding 2mm in the middle.
This pre-beta was again cut apart and scanned and all detail was added for the first "true" beta.
 |
 |
 |
Fuselage enlargement on the Pre-Beta
 |
|
| |
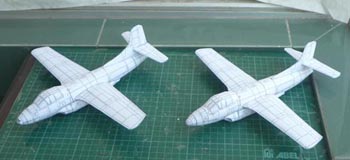
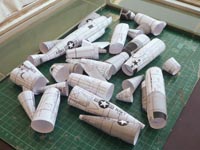
This was a prelude to a messy development. Several times during the development I found out that I was dissatisfied with the proportions. This led to a long chain of betas only for the shape and made nonsense of my thought, this model could be done quickly, because there are no camouflage liveries that take too many test builds. In all I had to do 7 beta versions until I was satisfied, with some major changes in the fuselage in the second last one.
 |
 |
 |
Betas 7 and 6 (from left)
 |
|
| |
The main problem in the proportions was the relation between engine sections and fuselage. Another big issue were the noses, which at first didn't end up as rounded as I had wanted them to. The engine exhaust section was also a tough area, but it turned out nicely after I made corrections on an enlarged one. Another part that was enlarged was the short nose with the gun ports. That also caused a lot of trouble in the paint scheme work. The paint scheme which took the most effort was the VF-11 "Red Rippers". It took numerous test builds and corrections, until the stripes on the nose aligned correctly. While I had been worried about the Air intake warning triangles, they turned out to be not as much trouble, even when I had to redo them when I changed the fuselage proportions.
Once the basic model was done, it was easy to create all the different versions, and I was rather proud, with how the model turned out after so much trouble.
 |
 |
|
 |
 |
|
|
| These were test builds to check if the paint schemes align at the seams |
|
Betas 1 to 4 |
| |
|
|
|
 |
 |
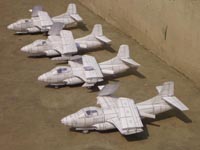
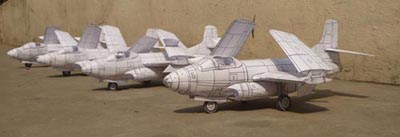
A flightline of four Skyknights - All Betas built with landing gear down and folded wings
 |
|
|
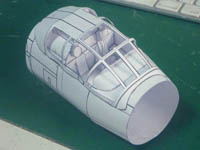
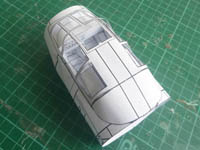
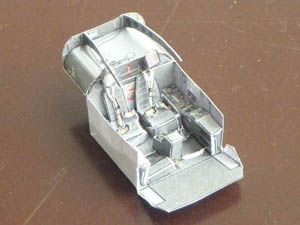
| The Skyknight's cockpit kit was actually created along with the model itself, which can also be seen from the windows being cut open on the betas. Photos of the first full build were taken with a clear canopy and the classic canopy with blueish shades. Like all cockpit kits, it was test built in double size. |
| |
 |
|
 |
 |
|
|
| Enlarged test builds for the cockpit section |
| |
|
|
|
 |
 |
first ever build of the cockpit, before being installed into the fuselage
 |
|
| |
For the re-release of the Skyknight, I also designed the projected swept-wing version, which was actually ordered by the U.S. Navy, but never built or delivered. To create it, I modified the existing fuselage with swept wings and tail surfaces. This version was first created in 2017 but lay undeveloped for a long time. As there are no authentic markings, a variety of potential markings were created, based on the main variety of markings available for the F3D.
The part numbers were kept the same as good as possible, but the instructions had to be modified completely.
|
| |
| Thanks to Leen from the Netherlands for building the China Lake version in the model gallery |
| |
| return to top |
| |
