|
|
back to Sea Hawk main |
 |
About designing the Sea Hawk
|
| |
|
| |
I first considered doing a Sea Hawk around 2011, but it still took another year until I started. I basially considered it a quick one, a small exercise to prepare for the Tweet.
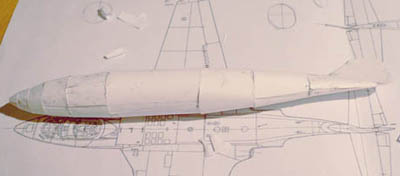
The prorotype was quickly done without major challenges
|
 |
|
 |
|
|
|
| These were test builds to check if the paint schemes align at the seams |
|
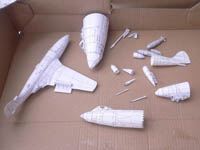
Betas 1 to 4 |
| |
|
|
 |
|
Betas 7 and 6 (from left)
|
|
|
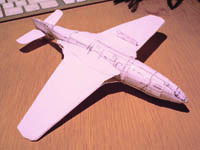
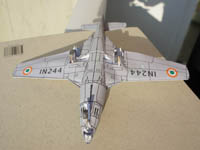
By 2013 the first beta was done. To be able to use the photos for the model gallery I gave it Indian markings. It did not have any major issues, lines didn't align properly, fuselage parts had to be adjusted.
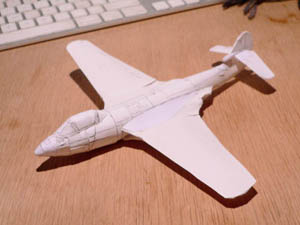
This first beta actually had a little accident, when it fell off my balcony in Hanover during shooting. If calculated to scale it went into a 960m nosedive smashing into the ground. The nose was quite smashed. I flattened it and then built the landing gear
|
 |
|
| The Beta 1 after its 960m nosedive. |
| |
 |
|
 |
|
|
|
| Beta 1 with landing gear. Note the glued-on roundel on the fuselage. |
|
Beta 1 from below, with non-standard type. This was re-done for the final version of this livery |
| |
|
|
|
| |
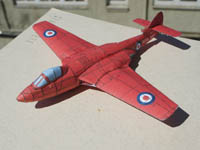
The second beta was in the paint scheme of the Red Devils and had some small improvements, mainly on the fuselage shape. For the third beta I had the details for the folding wings ready and those were tested. It was also the first version to have the roundel on the rear fuselage aligned across seams as well as livery lines.
|
 |
|
 |
|
|
|
| Beta 2, still with glued-on roundel |
|
Beta 3 |
| |
|
|
|
| |
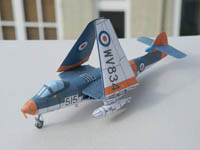
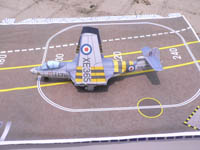
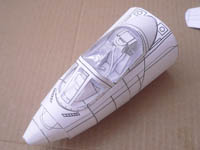
The next step was Beta 4, the first to include the Suez Stripes. This finalized the canopy which as usual had some problems. The main model was done up to here. This beta lay around unbuilt for a long time, until I finally got to build it and draw the instructions 2020 during CoViD-Lockdowns.
During that time I also created the-carrier-deck background to shoot on.
Betas 5 and 6 quickly followed including enlarged cockpit testbuilds and the external stores. Tricky elements that needed improvement were mostly the wing root, the nose landing gear wheel well and the speedbrake-flaps. Originally, I had the speedbrake-flaps only in a way that both are opened, but that was troublesome to build. Next I tried to make them separate, but that also didn't work.
The cockpit and sculpted landing gear also needed massive adjustments.
|
 |
|
 |
|
|
|
| The Beta 4 on the A3 carrier background |
|
Betas 5 and 6, with the early all-open-only speedbrake-flap |
| |
|
|
|
 |
|
 |
|
|
|
| Enlarged cockpit test build |
|
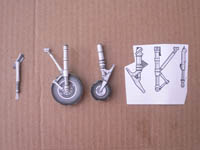
enlarged sculpted landing gear |
| |
|
|
|
| |
| Beta 7 finally managed to get the speedbrake-flap design right in a way that it would be practical and look good. While taking some liberty compared to how it looks on an actual Sea Hawk, it works well enough. This test build also included colour tests. |
| |
 |
|
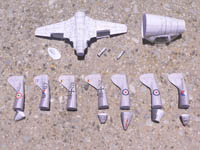 |
|
|
|
| final version of speedbrake-flap |
|
Beta 7 and livery tests |
| |
|
|
|
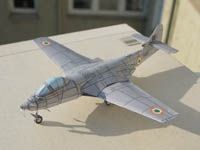
Once the model and also the stripes and liveries all were done right, the version work could begin. When I built the final version for showing off the model, I tried for the first time to build the sculpted landing gear in 1:60 scale. Before I thought I myself can only manage to build it when scaled up, but I managed quite well, as I did have a lot of spares from test prints that came out with wrong colours. This led to some last-minute changes on the sculpted landing gear. On the final build I got lucky with some other last-minute changes on the livery, particularly the stencelling below the cockpit on the port side. Hadn't they aligned properly, this would have required further test builds.
Once the final model was built, I waited for weeks in rainy South China Summer to finally get a sunny day to shoot.
|
| |
| return to top |
| |