|
|
back to Pig main |
 |
About designing the Pig
|
 |
|
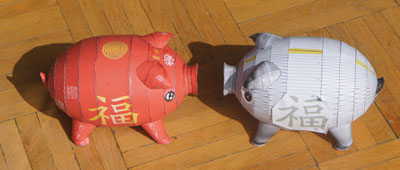
The finished new year pig meets with its ancestor the test build
|
|
The time when I would have to go into creating the pig was a busy one. I had just quit my job in Frankfurt am Main and was looking for a new place to live on the countryside. My wife and I ultimately decided to move back into my parents' house as my father was moving out.
Besides trying to find new home and new job, I had to prepare for the moving. After the moving was decided to happen end of january, I finally had a bit of time to get started on the pig.
|
|
|
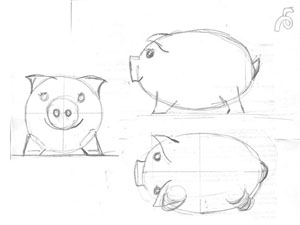
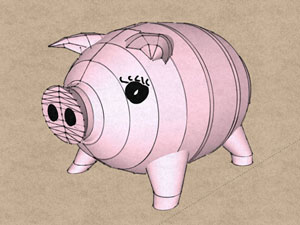
I wanted the pig to be based on a typical piggy bank, with an almost egg-shaped body, with tiny legs, ears and snout. Creating the body in sketchup was fairly easy, as I wanted it to be symmetric, so the front could just be copied to become the back. The sketchup model was based on a hand-drawn three-view, same as with the dog. The ear caused a bit of trouble. Once I had it done in a way that i was satisfied with, it turned out it wasn't a so-called solid, which meant I had to re-do it.
|
 |
|
 |
|
 |
|
|
|
|
|
| Body with snout and first ear version |
|
The finished pig, still with first ears and the sketches |
|
The new and old ear in comparison |
|
| |
It took a while to get the new ear to look just as good as the previous one. I made provisions for optional tails, as a version based on the Chinese new year style of pigs was meant to have only a tiny stub of a tail, whereas I wanted to also have a classic curly pig tail. I tried to do the curly tail in sketchup, but it turned out to troublesome to design and build, so I opted for the more simple version that is in the final model.
|
 |
|
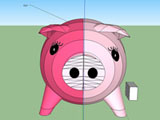
| The finished pig as a stylized image in sketchup. This image was used for the soft release |
| |
|
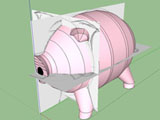
| Unfolding of the model was again delayed by the moving. And it also just takes time to unfold the model click by click, when one round element consist out of up to 180 surfaces, that need to be unfolded one by one through clicking. There are automatic unfold programs, but they don't work in my version of sketchup. (also when I tried them elsewhere i did not like the results) |
| |
 |
|
 |
|
|
|
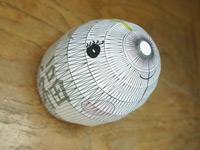
| The first test build |
|
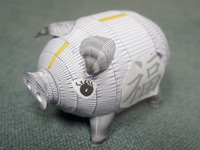
The second test build with the fu-character already on the parts |
| |
|
|
|
It took me a while to find time to actually build the testbuild after the moving, but fortunately there were no issues. It went together quite smoothly. Now the Chinese character 福 fu (happiness) had to be added for the Chinese new year version. I wanted it to be really big on the sides, which necessitated another testbuild, to see if it aligns good enough at the seams of the parts. By then, the actual Chinese new year celebration was already in progress. Still spending a lot of time on other things, I had no time to get the model ready. I was able to come up with finished versions to be released for Stahlhart papercrafts tenth anniversary on March 17th, but had to do a soft release, with only the instructions and the model files (both still error-ridden actually).
|
 |
|
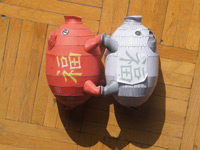
| Once again the new year version and the first test build |
| |
|
| In due time I was able to build the final version myself and then take some nice pictures in my garden. These were then released next, while it took several more weeks to prepare this article for publishing. Seeing such a sweet simple model like this pig, it is easy to underestimate the amount of effort required to create it, the instructions and also all the web content for its release. Fans of the animal series already expressed their anticipation of next year's rat model, but seeing a total change of my life and work circumstances, I will have to see how to pull that one off. |
| |
| |
| return to top |
| |