| |
|
|
|
back to Draken main |
 |
About designing the Saab Draken
 |
|
 |
|
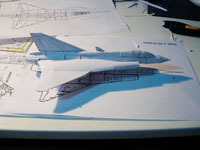
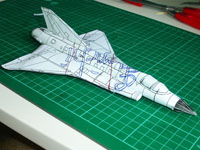
| The prototype after the fuselage is built |
|
The finished prototype without panel lines |
| |
|
|
|
| |
| |
The Saab Draken was the first jetfighter I ever knew about in my whole life, known to me then only under the name "The Saab". I just couldn't forget its shape after seeing it in a book.
But actually, when I started to built planes models, I never built it, mostly because there was no useful kit on the market at the time and because when I started to build paper aircraft, the Viggen and Gripen were more attractive. After I finished the Skylancer, I realized, that it was so similar to the Draken actually and that day I decided I have to do the Draken, I was so frustrated that my first F-18 beta was a complete mess.
|
 |
|
| The prototype from below. Note the "GUT" (good) on the, well, the good wing. |
| |
|
|
 |
|
|
| |
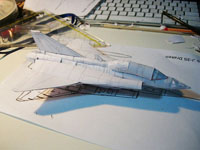
The prototype is trying on the 2-seater canopy |
| |
|
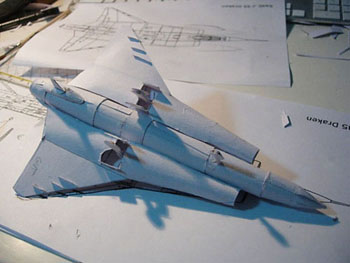
The construction of the prototype was easy, it went naturally and was a joy to build. I already included the landing gear well as it is in the final version in the prototype. In the first beta, which can be seen as the Austrian low-visibility version in the gallery, The biggest problem were the Air intakes, since I modified the cut there, to have the glue area to the fuselage and the intake warning will be easier to to unlike with the Skylancer. The second problem were the wings, which from then on were adjusted on every beta, altogether 14 times. In the final version they work fine. The difficulty of the wing comes from the uneven fuselage. The Skylancer's straight fuselage makes it easy to
wrap the wing around it, but the Drakens fuselage gets fatter where the engine begins. Also the panel lines cross over from wing to fuselage. |
|
 |
|
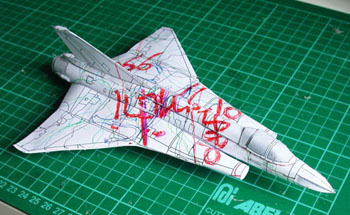
| The colour prototype. Each coloured line is a different paint scheme |
| |
|
 |
|
 |
|
| The lower side with the lines for the Ostarrichi and Dragonknights versions. |
|
I redid the Ostarrichi paint scheme in a second colour prototype |
| |
|
|
|
 |
|
|
| After I had finally found the blue version, I did a third colour prototype. |
|
|
|
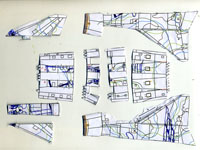
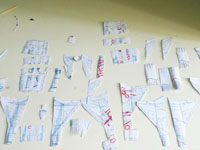
To minimize the required number of testbuilds, I did a colour prototype, that means i drawed the wanted paint schemes on the second beta, then took it apart to scan the parts to know where the lines should be. Then I did the Buffalo and Dragonknights versions in one Beta, with the Buffalo on the top and the Dragonknights on the bottom, which required 3 builds. The Ostarichi turned out horribly when I drew it, so I redid the colour prototype. |
| Another invention to save work was doing one testbuild for all camouflage versions together. Instead of the actual camo's, it had the coloured lines from the colour prototype on it. After a second beta, the camo's were okay. Then the Draken could have been released, but by a strange coincidence, I found 4 more versions, two of which I had been looking for, namely the yellow and blue versions. The other two I found were the Camo-swordfish and the ghost version. I had to do these also, so the release was further delayed, including another one month I was travelling. The Blue versions required another 5 testbuilds, but fortunately only twice as a whole. Then I still did the weapon sets. The version i did last was the weathered Danish version. I usually don't do weathered, but this one is too pretty like that. It was the final Draken I build myself. Now it's other people's turn. |
|
 |
|
 |
|
| The cut apart colour prototypes |
|
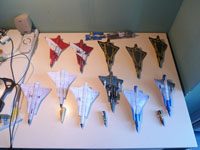
All surviving beta's note the grey first beta modified to the short rear version, the nose tests and the additional tests of the blue version in the back. |
| |
|
|
 |
|
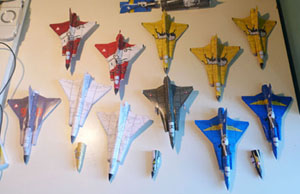
During the development of the Draken model I produced quite a squadron
|
|
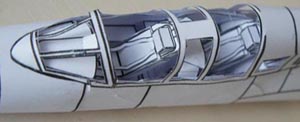
Created alongside with that of the Hornet, the Draken’s cockpit kit was one of the last two that had to be created, when all other models already had cockpit kits. The challenge here was the rather unique assymetric seat. Unlike for other aircraft, the canopy did not have to be tested, as the glass is almost straight on the A-version and the Two-seaters. When creating the artwork, I set it up to create a green and grey version, because the reference material witnessed the existence of both.
|
 |
|
Test built of the Two-Seater Cockpit in 1:30 scale
|
|
| |
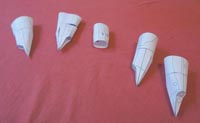
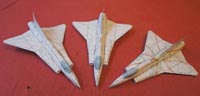
When starting to get ready for the big re-release in May 2016, I decided, that this could not be a definitive version of the Draken without the creation of the ‘Danish Dynamite’. While I had always considered doing it, I never wanted to get on it, because it meant a lot of work, because it required the creation of the Recce-Nose as well as many testbuilds of the livery. I did a total of 4 additional builds and while I was at it, i did include a new Camo-version for a Swedish reconnaissance. I also had to largely modify the instructions to include the new nose version. For the definitive versions I also corrected the Trainer to carry just a single drop tank on centerline.
|
 |
|
 |
|
| A collection of recce-noses |
|
The three surviving test builds of the ‘Danish Dynamite’ |
| |
|
|
|
| |
| I want to thank Lars Fors of the Swedish society for Aviation history. Without his help, some of the Markings wouldn't have been as detailed as they are. |
| |
| |
| return to top |
|
|
|