|
|
back to CH801 main |
 |
About designing the Zenith CH801
|
| |
I had never even heard about a plane called Zenith CH801, when a man from Australia called Logan approached me and asked me to give him advice on the model he was designing of that plane for a charity organization named Medicine On the Move (MoM). While Logan's efforts were promising for someone designing the first time, I figured, that it would be more valuable for MoM to have a truly great model, which can produce a lot of traffic on their website, so I decided to help MoM create such a model.
|
 |
|
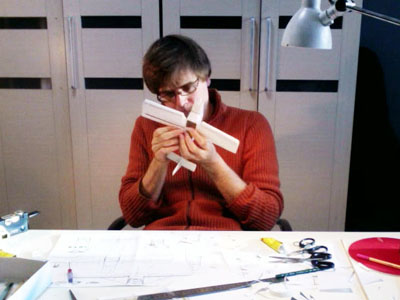
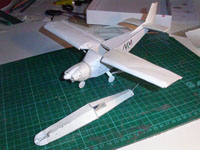
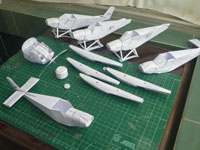
The prototype with the prototype float. Note how the rear fuselage is printed out by computer. |
|
| |
I decided to go away from my previous standards for this one, as a 1:60 CH801 would be nice, but tiny and won't allow too much detail, so I chose the very common scale 1:33.
For the prototype, I created the rear fuselage, the wing spars and the wing stabilizer on the computer first, and added additional parts by hand. The float was created at the time only as a single float, which was then completely redesigned in the computer to fit accurately.
|
 |
|
 |
|
|
|
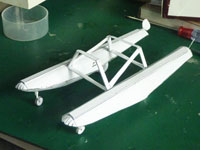
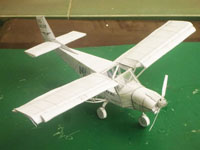
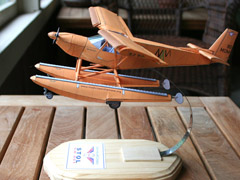
| The first beta |
|
the first beta from below |
|
| |
The first beta depicted the land-version of the CH801, because the floats were not ready yet. The cabin plus details and the detailed engine were completely designed in the computer with Freehand 2D-software. I gave the engine a testbuild in double size, as the actual size is too fiddly and couldn't show eventual problems good enough.
The main problems of the Beta 1 were the LEX, the wing tip and the cowling. All of them were corrected adequatly in the second beta.
During the creation of the Beta 1 I also produced the struts for the floats, which could then be attached to the second beta, with the two floats being beta 1 and beta 2 float.
|
| |
 |
|
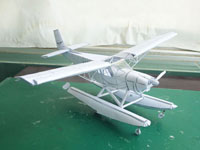
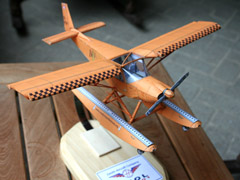
At this point only a few details were still inaccurate, such as the tips of slats and flaperon, the rounded wheels and the cowling. I used a number of upscaled test builds to get them right. Especially the wheels I had to do them over and over again. |
|
|
|
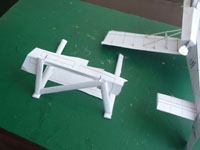
| enlarged float struts for improved correction |
|
|
|
|
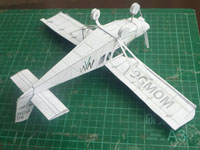
Aside from detail parts all subsequent betas were only the cowling and fuselage and the floats. The floats didn't fit properly at the sides and the rounded part at the front of the floats needed to be improved. During this phase of the betas I also made provision for future additional liveries, drawing lines on the fuselage and making sure they align after the build.
|
 |
|
 |
|
|
|
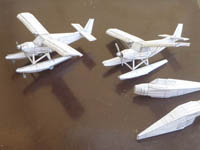
| betas 3-7, beta floats, an engine test build and wheel tests |
|
The very same from another angle |
| |
|
|
|
After that it was a matter of drawing all the detail artwork, which in this case included placing every screw and rivet, plus creating the structures for the cabin and panel as well as the details on the engine.
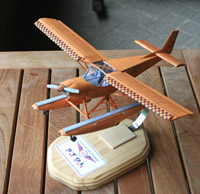
Once the detail artwork was done, I had to go into building at once, because Captain Yaw from MoM had asked me if he could get a build version of the model for Oshkosh Air Venture 2012. Through papermodelers.com, I made contact with David from Minnesota, who lives 20 miles from Oshkosh and agreed to build the model and deliver it to Oshkosh. At the same time, I went ahead with my own build (the one seen in the gallery) and provided David with photos and the drawings that later became the instructions. His was not an easy job to build the model without proper instructions, but he did an excellent job, building the model better then myself. He also created a stand which can be attached to the model through a magnet! Then he delivered the model to Captain Yaw and his crew at Oshkosh. The model was then brought to Ghana, where it is kept as a reminder of the goal of MoM; to build a working version of the very same plane in 1:1 scale to be used in supplying the population around the Volta lake with urgently needed medical supplies. I did my best to produce this model, and I have no doubt that Captain Yaw and his team of young Ghanian women will do the same in building the actual plane.
|
|
 |
|
 |
|
|
|
| The model built by David from Minnesota |
|
|
 |
|
| The 1:60 scale betas |
| |
|
|
To allow inexperienced builders to construct a CH801, I turned the model into a simplified version in the standard Stahlhart Aircraft scale 1:60. This basically meant scaling the parts down by 55%. Several tricky parts, such as the wing detail and landing gear were largely simplified. I also created an entirely new cowling which is no longer split in two parts. Of course all the versions had to re-done and testbuilt. |
| |
|
|
|
|
| return to top |
| |
| |